Raw Image Processing For Mac
How to Transfer RAW Image to JPG on Mac pc and Windows? Should I select RAW format or JPG?
Many of the electronic SLR video cameras can shoot Organic and JPG structure, but what precisely is Organic structure? What are usually the advantages and drawbacks likened to JPG? Should we shop photos under Natural or JPG? Allow's attempt to recognize it. Variations between Organic and JPG: The Natural image file format is basically an image supply file that provides not become prepared. It shops the initial information taken by the digital camera, and there is certainly no reduction of details expected to image processing (such as image sharpening, increase color comparison) and file data compresion.
However, the thing to keep in mind is that RAW is not simply an image file, but rather RAW image data that needs processing. This is a good thing—because shooting in JPG makes decisions for you that can’t be changed. Many image-processing apps focus on improving RAW files, which is the data taken straight from the camera's image sensor prior to any processing taking place within the phone or camera itself.
But we need to use dedicated software to open these documents. Many of nowadays's digital video cameras can shoot RAW file format, but various manufacturers are using various extensions and formats, like as CR2 or CRW (Cannon), NEF (Nikón), ARW ór SR2 (Sóny), RAF (FujifiIm) Etc., these producers use own software to handle their Natural photo structure. Another typical format is definitely JPG, the camera will bottom on the consumer's configurations for image processing, compression (based on quality environment in the cameras) and storage.

Why use RAW format? RAW will be a commonly utilized format by expert photographer because it maintains original details, allowing significant post processing task by customers, like as adjusting white stability, exposure level, color comparison settings; it is definitely especially helpful for newbie to cure failed photos, and the pictures are capable to become restored to primary state regardless of any modifications from article processing job. Another benefit of Organic is definitely the ability to appropriate reduction of light and deformation from zoom lens by making use of Cannon DPP software program.
What are the advantages of JPG? JPG is definitely a very well-known image file format and generally utilized by nearly all modern digital cameras, most computer systems are able to open the JPG documents, the user are allowed to set the level of data compresion to preserve the level of quality (the greatest JPG quality is really close to RAW), so it is usually a very convenient structure. Should I make use of RAW or JPG? Before talking about this issue, allow us recognize the disadvantages of the RAW format:. The dimension of Organic file is much bigger than JPG credited to the amount of information in it. So there will end up being higher necessity for storage space capability and longer file transfer period. RAW document require dedicated software and could not be opened up without the software program set up.
Refer to (2), you might not really be able to process the photos if no assistance for the dedicated software program in future. The fastest period to open a Natural file will be relatively long at 8 to 9s, and could extent to 20s. Different software has different way to translate RAW file format, so a Organic document may not look the same in Photoshop and Nikon Capture NX. The dedicated software marketed by producers at high (Canon DPP is usually accessible to download for free, Nikon NX is certainly available separately).
After understanding the shortcomings of Natural, we can choose when to choose RAW or JPG:. If you need to consider large amount of photos, after that you should think about making use of JPG because of its fairly small requirements for capacity, post processing and conversion period. If you are taking photos for industrial use and need a great deal of posting processing, after that consider using RAW credited to that flexibility.
RAW file allow treatment for failed photo and because you may not really be going to the places again, so consider using Natural or Organic + JPG if you are usually taking photos during traveling. How to convert RAW image to JPG structure? If you have previously used images in Natural structure and incapable to open up them from your personal computer or mobile cell phone, you should consider converting them to well-known image forms like as JPG, GlF, Tiff ór PNG. At present, there are a great deal of software program capable to transform Natural to JPG, but it is certainly very important to select one that is definitely useful and professional, therefore we bring in to you how to make use of AppleMacSoft Image Converter. This software program is able to batch conversion from Natural to JPG file with convenience. Below are usually detailed stage by action guidelines: Step 1: Download the software from the following links and install it on your computer.
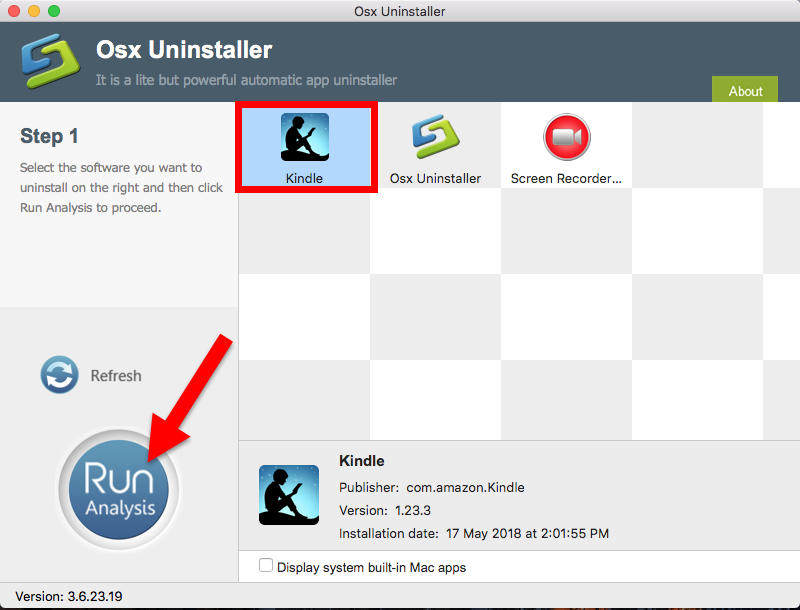
(version: 1.3.1, dimension: 3.1 MB) (version: 1.3.1, size: 2.1 MB) $19.95 USD Phase 2: Open up the software program and the main interface will be as follows: Phase 3: Click on the 'Increase images to transform' icon at the best left corner to transfer the RAW photos that you wish to convert. Action 4: You can arranged the output variables at the correct part of the interface.
Select JPG as the output file format and specify a place where the result will become saved. Phase 5: Click on the Convert switch and the plan will quickly convert RAW pictures to JPG structure. The transformation just take a several secs unless you are converting more than a several hundred documents. Converting RAW to JPG structure is extremely basic with AppleMacSoft Graphic Converter. Simply download the trial version and start the miracle conversion.
Associated Articles:. Version: 1.3.1 Cost: $19.95 USD You can use Graphic Converter under Home windows and Mac operating systems with the exact same permit. ScreenShots Our customers recommendations I have looked significantly and broad to find a software that will transform my 1200 images to jpeg in a set procedure.
It took me numerous a few months of searching for, but your software program really will make the image transformation easy. Tom Stark If what you wish is definitely the capability to rapidly decrease the dimension of photos, this is certainly the item for you. Functions quickly and minimum amount of understanding required.
I can now 'shrink' down image sizes and e-mail them or posting them online significantly more conveniently. Great item. Kenny The system is exceptional and I like using it because it allows me to transform TIFF and other formats into platforms supported by the MotoroIa RAZR v3. l take pleasure in making use of the plan because it can be easy to make use of. Samuel Morehead I possess used graphic converter mac a several instances to convert photos from PNG tó jpeg ánd it worked completely and therefore easy also for a newbie like me.
Your item is well worth the cash. Casey Hillman Guide Tips.
Canon's Digital Photo Expert (DPP) is usually a free, and remarkably powerful, image organising and modifying application that ships in the box with every EOS camcorder. You'll discover DPP on thé EOS Digital Option Cd disk alongside other quite useful Cannon developed software, like as EOS Application. CPN writer George Cairns requires a closer appearance at the capabilities of the DPP software program up to edition 3.13.0. If you think about your Organic images data files as digital negatives then, like conventional problems, they require to end up being processed in order to expose their real colours and colors. DPP provides all the digital darkroom tools you'll require to claw back again highlight or shadow details, remove colour casts and crop to improve structure.
Digital Photograph Professional can be specially made to function closely with your Canon EOS cameras and lens, thus allowing you to right more difficult problems like as chromatic abérration and lens-reIated artifacts like as distortion and vignetting. In this write-up we'll consider you on a extensive tour of the effective functions of this Canon image processing software. Maintaining up to date and setting up. You can consult Digital Picture Expert to open specific file types - like as JPEGs, RAW data files and TIFFs - after EOS Electricity has imported them. At the period of creating the latest incarnation of Digital Photo Professional software program is edition 3.13.0, but it's properly worth keeping DPP up to day. The latest version supports new Cannon lens and recognises Natural format documents from the even more recent Cannon EOS DSLR camcorders. If you've got an older edition of DPP currently installed on your computer it's free to update it.
Indeed, if you've lost your software storage, you can download and set up DPP for free of charge. To download an revise for DPP (or set up it from damage) just click on for the Canon Europe Download Centre, then select your product kind and cameras model information and select the software option.
The menu will provide a range of downloads such as ImageBrowser Ex girlfriend or boyfriend, EOS Power and EOS Digital Solution Disk Software, so scroll straight down and click on on the suitable hyperlink to download DPP for Macintosh or Windows. While you're also now there, you can furthermore download a duplicate of the EOS Energy software. You will furthermore discover a copy of DPP't manual, which will help you to further maxmise all of the benefits of the software program. Once DPP and the EOS Application have been installed, plug your Canon EOS video camera into your pc. If you've currently opened up DPP you can choose ‘Equipment >Start EOS Power' from the major home window's menus. In EOS Energy, proceed to ‘Preferences' and choose ‘Linked Software' in the drop-down menu.
In the ‘Linked Software program' menu, choose ‘Digital Photo Professional'. Click ‘Sign up', choose the document sorts that you would like DPP to open up as shortly as the EOS Application has brought in them, after that Click on ‘Okay'. The Quick Check look at in DPP allows you to designate Check scars or Ratings that allow you to organise your photographs.
Take note that you can check AF points and metadata in Fast Check. Quality control - rankings and check out scars As your digital collection proceeds to grow it can become an boosting challenge to handle it. By default almost all image processing apps screen photos according to taking date and DPP is no exception. However, DPP allows you to type imported pictures by determining rankings or check out marks to them.
In DPP search to a folder of imported photos in order to see them as thumbnaiIs. You can select ‘Look at >Large Thumbnail' for a closer appearance, but to get a much better idea of a photo's high quality select ‘Equipment >Start Quick Check out tool' (or click on the ‘Fast Check' symbol). Here you can focus in to check the focus - and actually discover which autofocus stage was used when recording the chance. You can summon the chance's metadata too, which assists you find out if a quick ISO rate setting is usually likely to include sound, for illustration.
Make use of the Kind menu in DPP to display documents hierarchically based to their assigned star ranking. You can make use of Quick Examine to indulge in some quality control. Include a celebrity ranking (from 1 to 5) to highlight your favorite photographs, or assign a numerical check tag to sort shots by theme or type (such as scenery or portrait). Assign rankings and check out marks to thumbnails in DPP's main windowpane. As soon as you've graded or verify proclaimed your brought in photos you can after that use the ‘Sort' menu to display the highest ranked images at the best of the main home window, or screen them by their numerical check scars. You can also select ‘See >Thumbnail with details' to list metadata alongside éach image.
The handy histogram allows you to spot any images that might need exposure modification. You can also save specific data files from any foIder into the ‘Collection' tabs so they can end up being easily discovered afterwards. You can personally hide artifacts like as sensor areas by using DPP's i9000 ‘Stamp' tool to duplicate adjacent sections of pixels over them.
Additionally, use Apply Dust Delete Data if you've set that functionality up in-caméra. If you're also experienced with a particular problem, such as a tilted horizon, after that you can choose ‘Equipment >Begin Cutting/Angle Adjustment'.
This enables you to quickly harvest the chance using a range of predetermined aspect ratios, as nicely as making use of the Angle slider to better align any uneven horizons. An elective overlay grid enables you to notice true side to side and top to bottom lines so that you can adapt the angle with precision. When editing in RAW format you can regain cropped detail at any period, as DPP can make non-destructive adjustments to the first RAW data files. To gain access to even more of DPP't Organic processing equipment, click on the ‘Edit image' windowpane symbol and then click on on the ‘Device palette' image. In the Device colour scheme you'll find four tab - Organic, RGB, NR/ALO and Lens - that will let loose a host of effective image processing tools. If you can't find a ideal White Stability preset, you can make use of DPP's ‘Click whitened stability' eyedropper to test an region that should become a natural white. The Organic tab enables you to alter the video camera settings.
The White colored Balance or Picture Style preset that you used to catch the photo is pointed out by a little surveillance camera image. You can use fall down menus to test with various other White Balance or Picture Design presets and change the colours and hues of your chance in a couple of clicks.
You can also manually tweak properties such as colours, colors and sharpness making use of the Natural tabs's sliders. On the other hand, you can heated up or amazing down a shot and remove color casts by clicking on an eyedropper on an region that should be white. Sound Decrease and Auto Lights Optimizer. The Noise Decrease/Auto Lights Optimizer option of DPP enables you to alter chrominance or luminance image sound in either RAW or compressed pictures, and offers control over modification of lighting or comparison in images. In the Edit Image windowpane you'll discover a useful Noise Decrease/Auto Lights Optimizer (NR/ALO) tabs.
This allows you to reduce chrominance or luminance image noise in either Organic or compressed images by tweaking slider configurations. There's i9000 furthermore an Car Lighting Optimizer handle that allows you to quickly auto appropriate complications with lighting or contrast. This tool does the same work as the ALO feature in your Cannon DSLR (it can be in all present EOS DSLRs), which is usually created to also out contrast by selectively changing locations of the image. It is certainly especially helpful when using display or with backlit subjects as it can identify faces in the frame and brighten those places to attain a better outcome. ALO analyses contrast in taken pictures and changes both dark areas and highlights via firmness curve modifications to minimise loss of details in contrasty light situations.
In-camera there are three levels of setting up strength - Regular, Lower and Solid - which can be utilized at any ISO acceleration, as nicely as the capability to change the setting off (recognized as Disable). Thé in-camera AL0 outcomes can end up being further fine-tunéd in DPP. ln DPP't Edit windows you can make use of the RGB tabs's curve device to enhance contrast (or bring back tonal details) by personally re-shaping the shape. One of DPP's almost all effective image adjustment tools can become discovered in the ‘Edit image' home window's RGB tabs. Here you can place factors on a overall tone contour and after that pull them up or down to alter the dark areas or features in an image. It'beds quite simple to move over-the-top when personally editing factors on a competition, so you can consider and improve contrast automatically by pressing on the color curve assist symbols. Compositing Device Digital Photograph Expert's relatively fresh Compositing tool (initial observed in DPP 3.11) opens up some creative layering possibilities.
After choosing your primary image you can transfer a history photo and after that use the Blend Method fall down menus to adapt the way the photos mix collectively (in a related method to Photoshop'beds layer blending settings). Making use of the Compositing Tool of DPP software you can rapidly and conveniently transfer and combine multiple photos together to produce creative amalgamated images. Obtainable from the Tools menus of DPP, the Compositing Tool allows multiple pictures to be mixed with specific handles to determine how each personal layer will build on the types decrease in the general amalgamated. There are four set forms of composites: Include, Standard, Lighten and Darkén, plus the helpful Weighted choice that offers precise control over which layer of the composite is more or less clear. In exercise the Weighted option is frequently the most flexible setting. Image layers can end up being individually modified for placement comparative to some other image layers, if required. You can make use of the Weighted slider to create one image even more principal than the additional and modify the placement of the overlapping pictures by tapping ón arrows.
You cán construct up several layered results by clicking on ‘Continue' and adding new photos. High Active Range (HDR) image procéssing With some óf the newer E0S DSLR camcorders featuring built-in High Dynamic Range (HDR) imaging features (first launched in the EOS 5D Mark III in 2012), DPP moreover offers HDR image procéssing for all E0S surveillance camera owners. Equivalent to thé in-caméra HDR processing óf the EOS 5D Mark III, the HDR order in DPP processes and brings together three images to produce an HDR blend. The supply images for the HDR procedure can become captured making use of the camera's auto-exposure bracketing functionality. By shooting a collection of bracketed photos you can catch both focus on and shadow details in a high contrast scene and combine the shots together making use of DPP's High Dynamic Range (HDR) command word. DPP'beds HDR menus command has controls that allow finé-tuning of lighting, colour and information.
It requires the selected pictures and processes them using the default ‘Organic' profile to produce quite delicate outcomes. If the pictures were used with the camera mounted on a tripod then they should all be lined up, but if the camera was handheld then the HDR Tool can end up being established to immediately align the structures. Brightness, saturation and contrast sliders can become utilized to modify tone and colour, plus power, smoothness and fineness modify the fine detail enhancement, therefore generally there's plenty of handle over the last image. You can also select from various presets such as Artwork Standard, Artwork Vivid, Art Daring and Art Embossed. Since the presets alter the configurations of each óf the six sIiders they allow a photographer quickly obtain their designed outcomes. You can finé-tune any óf the sliders oncé the preset has been applied.
You can use the Lens aberration modification equipment of DPP to counteract common lens-induced artifacts such as distortion and vignetted sides. Digital Lens Optimizer (DLO) The newer variations of DPP software (from 3.11 onwards) furthermore consist of the Digital Zoom lens Optimizer in the Zoom lens tab, therefore enabling you to deal with a wider variety of zoom lens aberrations and, in convert, produce better looking shots.
The Digital Zoom lens Optimizer is definitely a exclusive kind of image processing that achieves ideal optical characteristics by processing opticaI aberrations, image treatment due to lens diffraction and the results of making use of a low-pass filter with a CM0S image sensor. Presently 64 various lenses are usually backed, in mixture with several Canon EOS camcorders. To get the Digital Light Optimizer (or the Zoom lens aberration modification function) to function, you very first need to download your zoom lens profile to DPP. Canon advises you to turn off any sharpéning in the Natural tab before applying the DLO. You can after that sharpen the photo, but you won't want to sharpen it as very much thanks a lot to the improvement created by the DLO. Functioning with Natural images, the Digital Zoom lens Optimizer is definitely made to correct seven sorts of lens aberration:. Circular aberration - image blur that happens in the centre of the image.
Industry curvature - blurring at the edge of the image created by the zoom lens' bent focal plane. Astigmatism - bIurring in the radiaI and round directions at the imagé periphery. Comatic abérration - colour blurring showing up at the advantage of the imagé in a radiaI direction (like a comet's tale). Sagittal halo - this shows up in the périphery of the imagé as a circular blur. Chromatic aberration of magnification - misaligned and confused colours at the périphery of the imagé.
Axial chromatic abérration - this is certainly mainly blue coloured blur that happens in the centre of an imagé where there are strong specular features. You can apply the DLO by hitting ‘Tune', ticking the Configurations package and after that increasing the strength of the slider. Click on ‘Save' when you're content with the outcomes.
The Digital Lens Optimizer will a better work than the Zoom lens aberration correction tool at getting rid of axial chromatic aberration. Result As soon as you've organised your photographs and modified them to your satisfaction using DPP's i9000 selection of image processing tools then it's time to discuss them with colleagues or clients. You can move an modified Organic image as á JPEG or TlFF making use of the Transfer and conserve command in the File menu. To rate up your output workflow DPP offers a Set process device image in its primary home window toolbar.
This enables you to consider a folder of Natural data files and result them to a more shareable JPEG or TIFF structure. You can furthermore re-size thém en-mass, change their resolution and give them fresh file names as well. Via the Group option you can transform multiple Natural files to re-sizéd JPEGS so yóu can place them online or discuss them quickly via e-mail. In conclusion When working in conjunction with the Cannon EOS Utility software, Digital Photograph Expert can empower you to arrange, repair and share your images effectively. Because DPP is definitely designed to work carefully with your Canon EOS video camera's menus configurations and lens, you should become capable to generate better seeking outcomes than you'chemical achieve with third party deals - specifically thanks a lot to the effective Digital Zoom lens Optimizer in thé Edit image windowpane's Zoom lens tab. If, for some reason, you've so far overlooked the EOS Digital Solutions Disk that arrived in the package with your E0S DSLR it's a great idea to download and get all of the available software for a check run.
You will become pleasantly amazed by how powerful and useful it is usually.
Catch NX-D is certainly a non-destructive RAW image processing application that utilizes a fresh sidecar program to conserve changes for Nikon photographers looking to make changes to their.NEF or even.NRW documents. Professional photographers who are used to functioning with their.NEF or even.NRW documents in Nikon Catch NX2 or Nikon Look at NX2 will find the new Capture NX-D quickér in its procéssing period and intuitive to make use of.
Once the.NEF or even.NRW document is processed, it can then be relocated to other imaging applications in a 16-bit TIFF format with a one click on of the mouse. Catch NX-D is definitely made to get the many out of Nikon Natural image files-so pictures will appear as excellent as they do whether they're from the latest Nikon surveillance cameras or older data files that you would like to function on once again. Catch NX-D'beds interface had been created for nowadays's digital professional photographer in brain. Flying palettes can be arranged in a work area that best facilitates your workflow design and needs-even situated on a second monitor-and you can select from seven different display styles.
Capture NX-D is definitely Macintosh and Computer compatible, and can open up and course of action.NEF and.NRW documents from all Nikón cameras-current ór older. Features of Capture NX-D consist of set processing, levels and curves adjustments, modifications to Nikon Picture Controls including the most recent Picture Control styles simply because properly as with Organic files from older cameras, whitened balance, noise reduction, unsharp cover up and video camera and zoom lens corrections.
Catch NX-D is the ideal Organic image processor for photographers who demand the supreme in image high quality as designed by Nikon camcorders. Processed Natural files can after that be stored as 16-bit TIFF documents for more editing and enhancing or retouching in additional image editing and enhancing programs such as Adobe® Photoshop® or even Nikon Catch NX2. Catch NX-D can be the ideal partner for those photographers who make use of Camera Handle Pro 2 software as it fully combines seamlessly for an improved workflow. Catch NX-D is usually available at no chargé-just downIoad it from óur website!